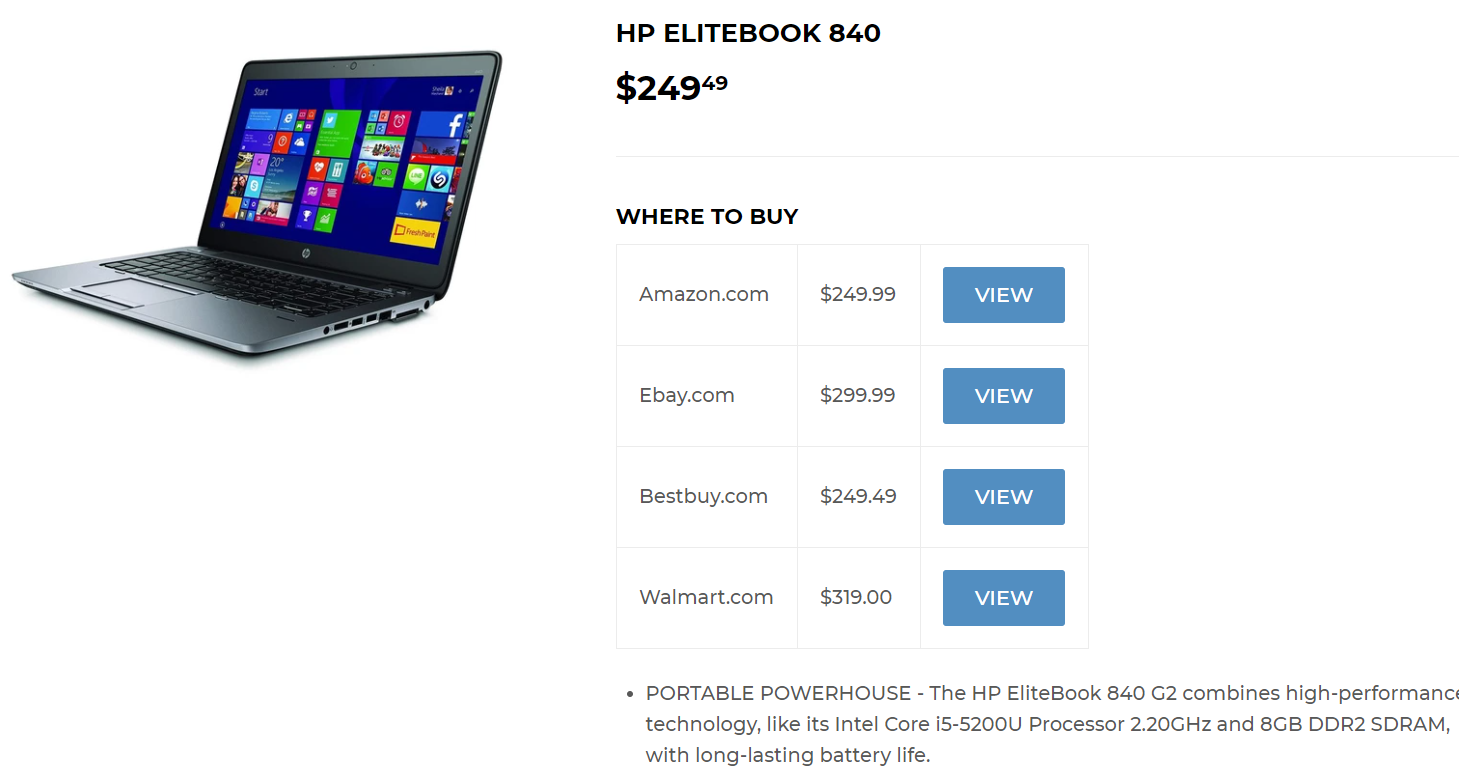
The Variant Table feature lets you display multiple purchasing options for a product in a clean, easy-to-read table. This allows customers to compare available stores or affiliate offers and choose the option that best suits them.
Variant Tables are ideal for merchants who want to showcase the same product from multiple sellers or affiliate partners, helping improve customer choice and increase click-through opportunities.
Step 1: Add the Variant Table App Block
Before using Variant Tables, you must add the Outlink Variant Table app block to your theme.
Follow the Variant Table App Block Installation Guide to add the block to your product template.
Step 2: Enable Variant Tables
- Open the Outlink dashboard.
- Navigate to Settings → Advance.
- Turn Activate ON.
- Click Save.

Step 3: Create Store Variants
Open the product you want to configure.
- Create a new variant option (for example, Size).
- Add a variant for each size (for example, Small, Medium, Large, and Extra Large).
Each variant will represent one purchasing option in the Variant Table.

Step 4: Add External Links
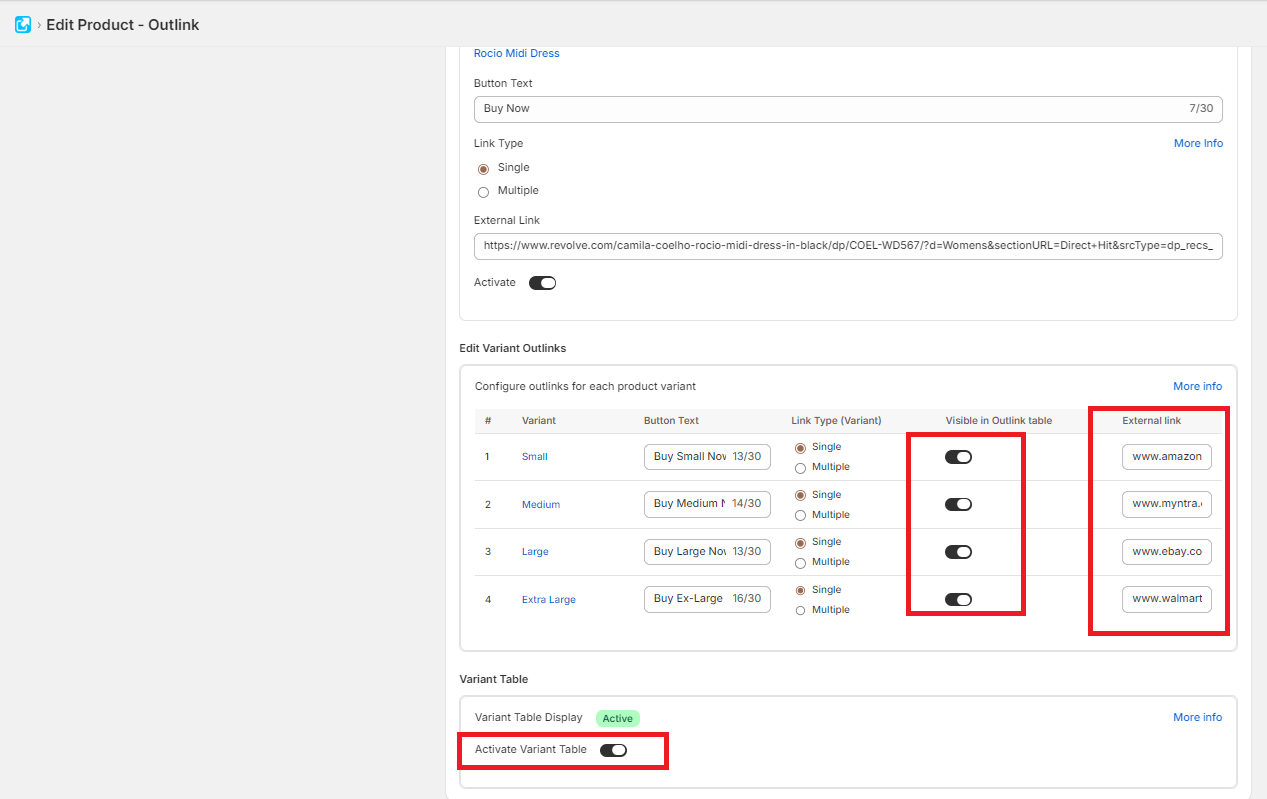
- Open the same product in Outlink.
- Click Edit Outlinks.
- Assign an external link to each variant.
- Enable the Variant Table option.
- Click Save.
How It Works
Once configured:
- Customers will see a Variant Table on the product page.
- Each row represents a different store or affiliate destination.
- Clicking the Outlink button for a row takes customers to the external link assigned to that variant.
This provides customers with multiple purchasing options while keeping everything organized on a single product page.
Note
The Variant Table feature is available on the Pro plan and above.