If you're using an Online Store 2.0 theme, you can easily add the Outlink Button to your product pages using Shopify's App Blocks—no code changes required.
Follow the steps below to add and position the Outlink button on your storefront.
Step 1: Open the Theme Editor
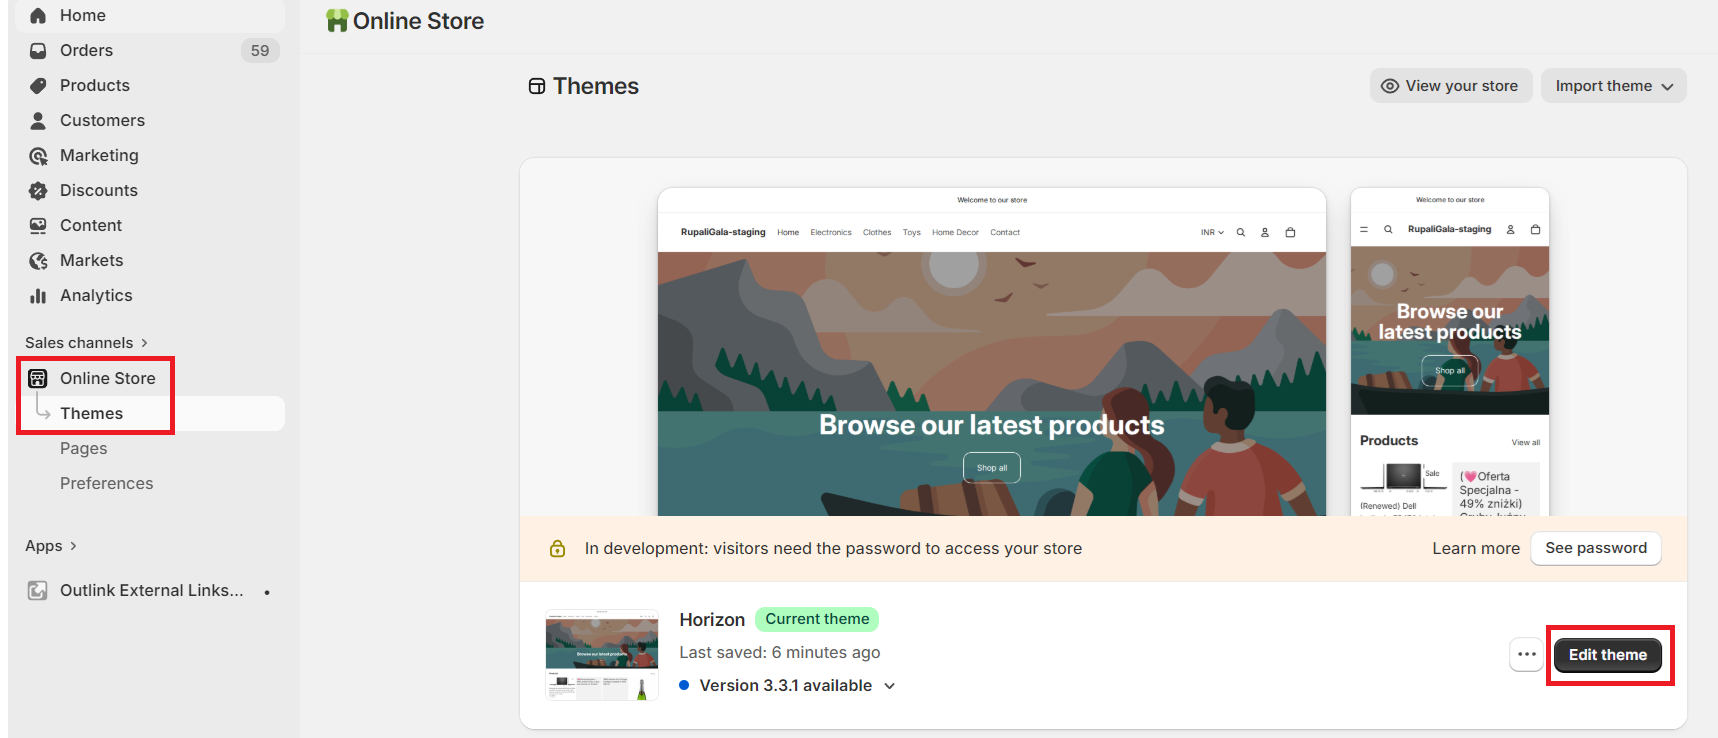
- From your admin, go to Online Store → Themes.
- Click Customize on your active theme.
Step 2: Select a Product Template
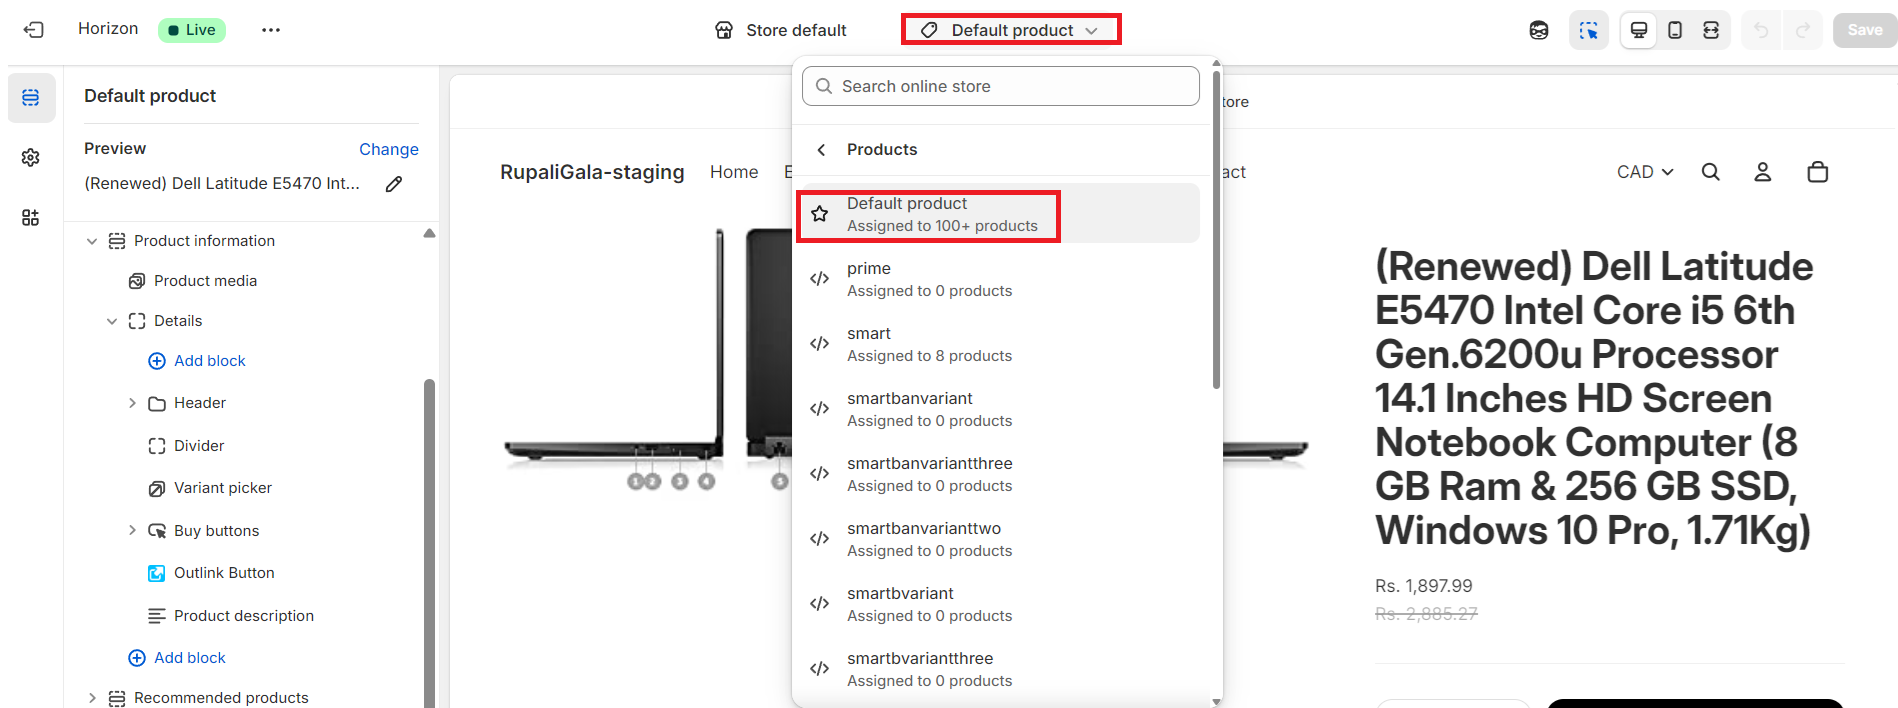
From the page selector at the top of the theme editor, choose the Product template where you want the Outlink button to appear.
Tip
If your store uses multiple product templates, you'll need to add the app block to each template where you want the button to be displayed.
Step 3: Add the Outlink App Block
- In the left sidebar, click Add block.
- Under the Apps section, select Outlink Button.
The Outlink app block will be added to your product template.

Step 4: Position the Button
Drag and drop the Outlink Button block to your preferred location on the product page.
Recommended
For the best customer experience, place the Outlink button directly below the Buy Buttons section.
Step 5: Customize the Button (Optional)
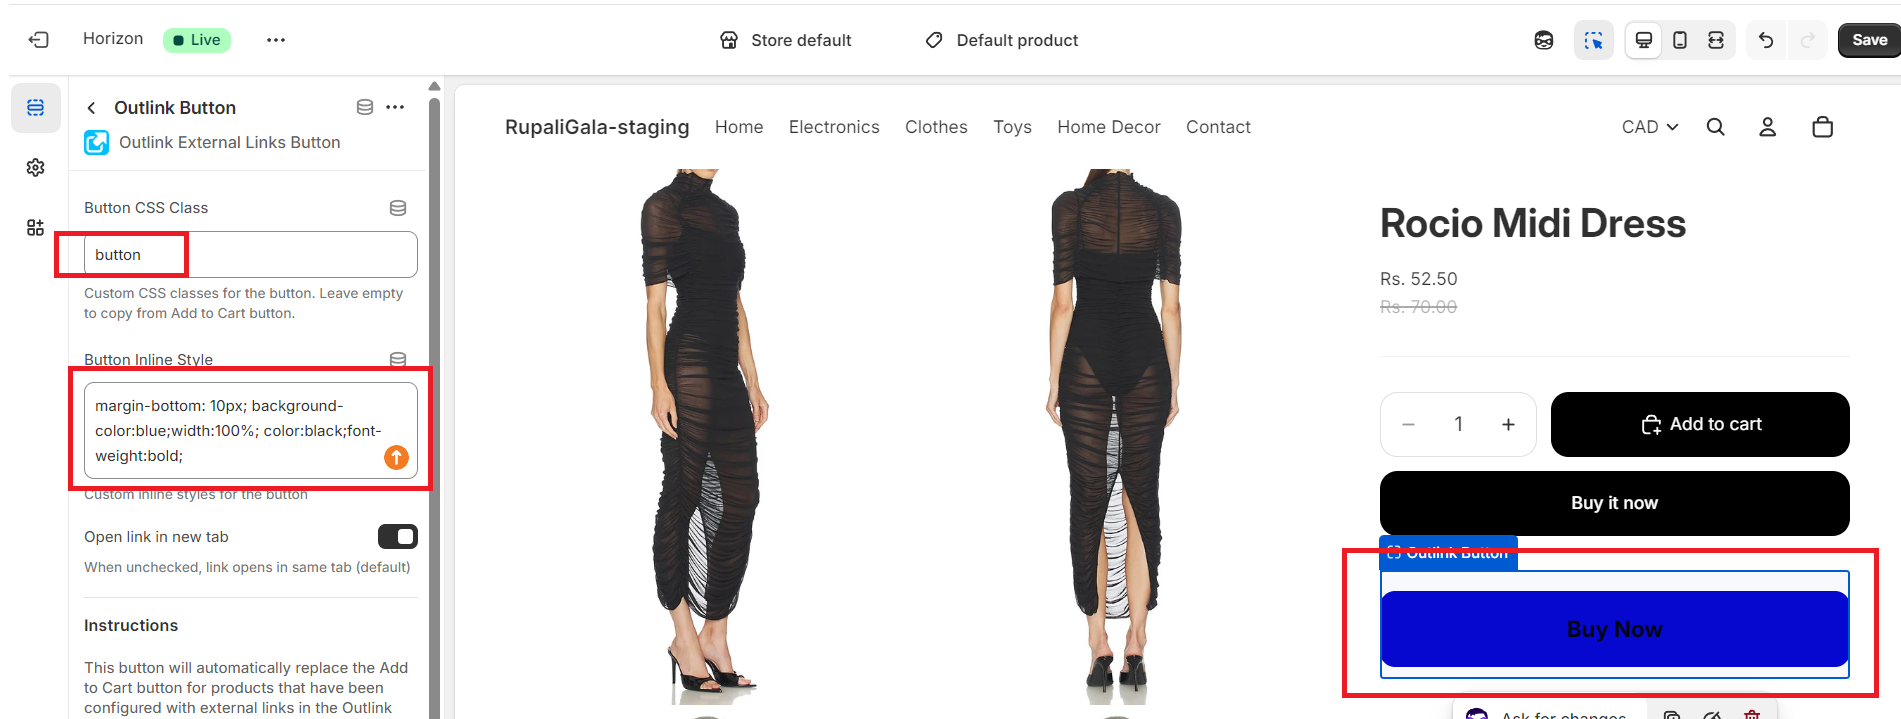
You can customize the appearance of the button from the app block settings.
Available options include:
- Class – Add one or more CSS classes (for example:
button) - Style – Add inline CSS styles (for example:
margin: 10px;)
These settings allow you to match the button with your store's design.
Step 6: Save Your Changes
Click Save in the top-right corner of the theme editor to publish your changes.
Step 7: Verify the Button
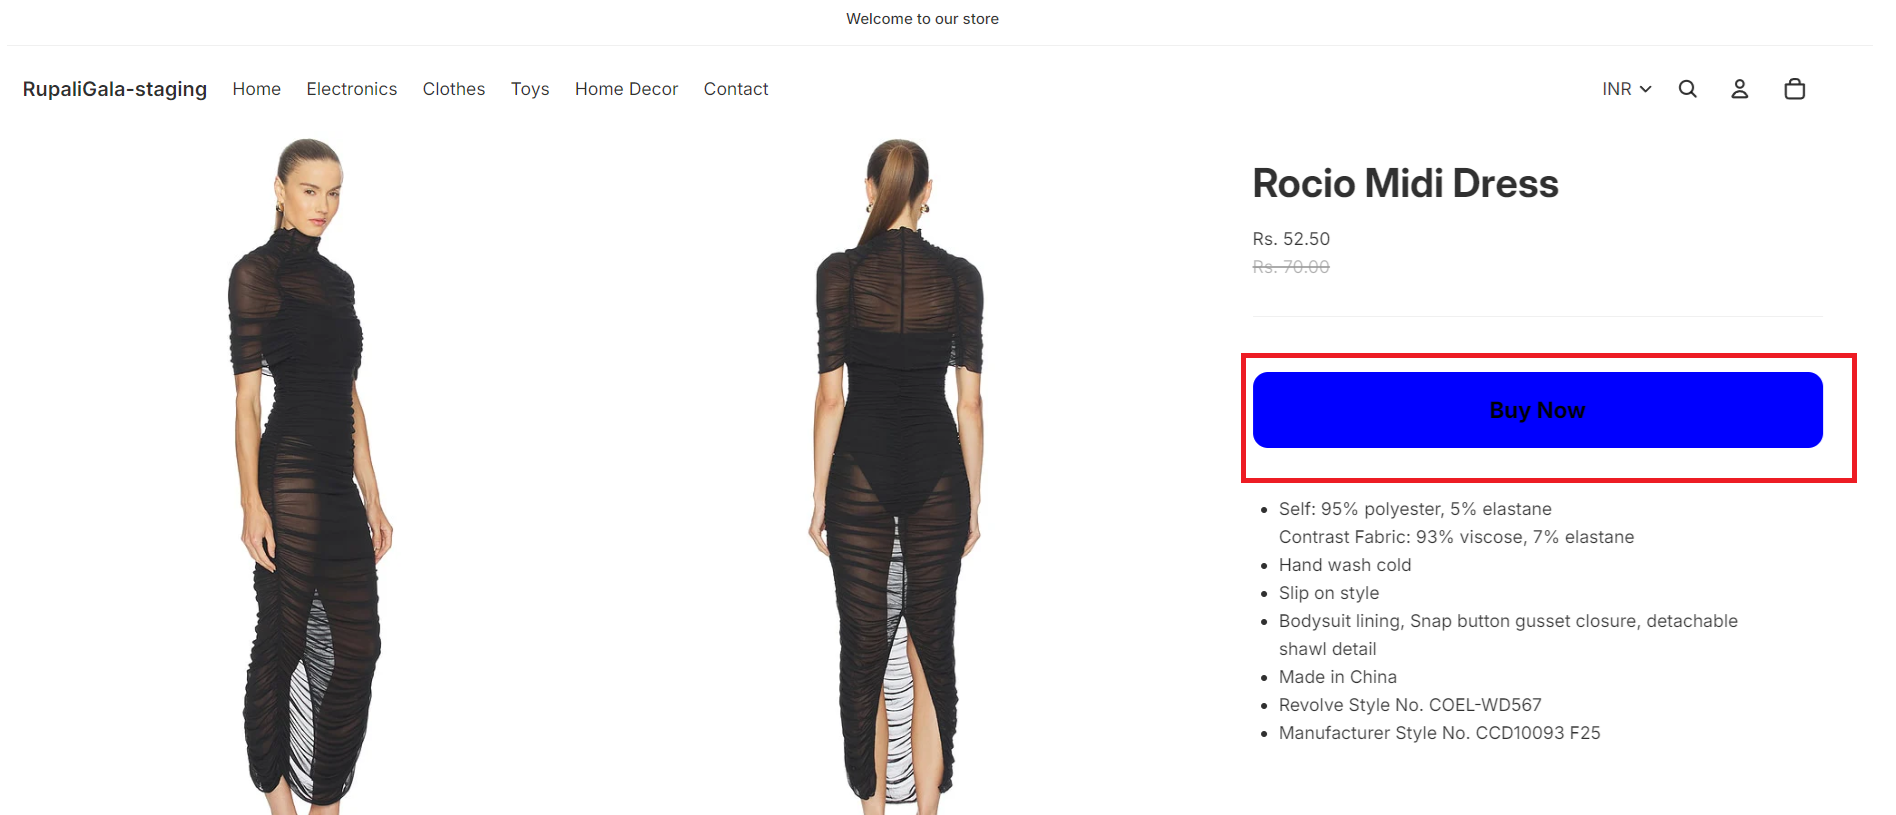
Open one of your configured product pages to ensure the Outlink button appears as expected.
The button will be displayed for products that have an active Outlink configuration.
Need help?
If you have problems with adding the button or want to change the way the button looks, or for any other request, please raise a support ticket here. We will take care of it.