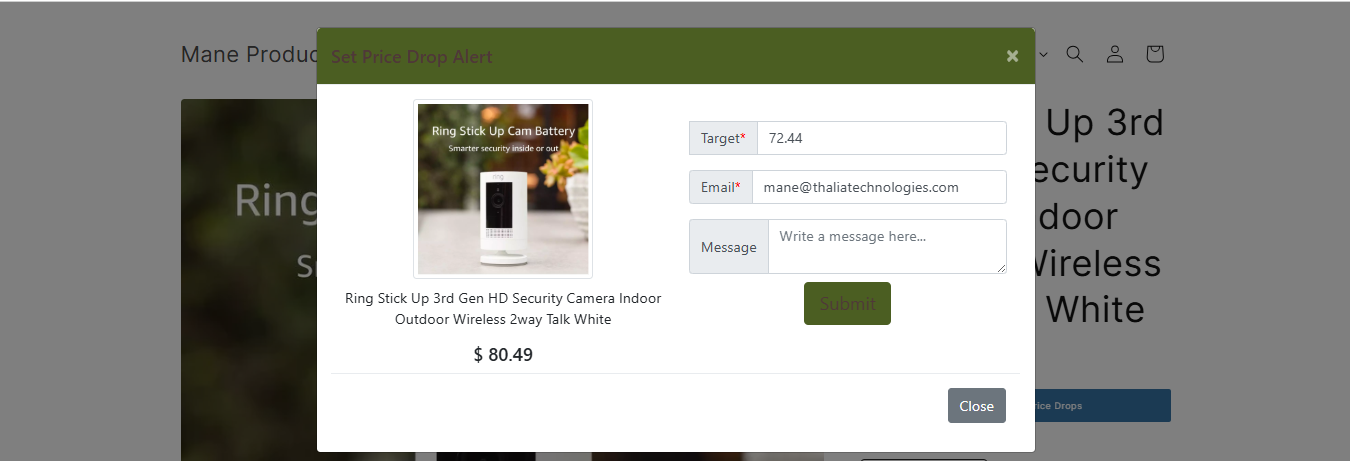
🚀 Step 1: Customer Subscribes to a Price Alert
On the product page, the customer clicks the Watch Price button and completes the subscription form by entering:
- 💷 Their desired target price
- 📧 Their email address
- 📝 An optional message (if enabled)
Once submitted, a new price alert request is created.
📩 Step 2: Receive the Subscription Notification
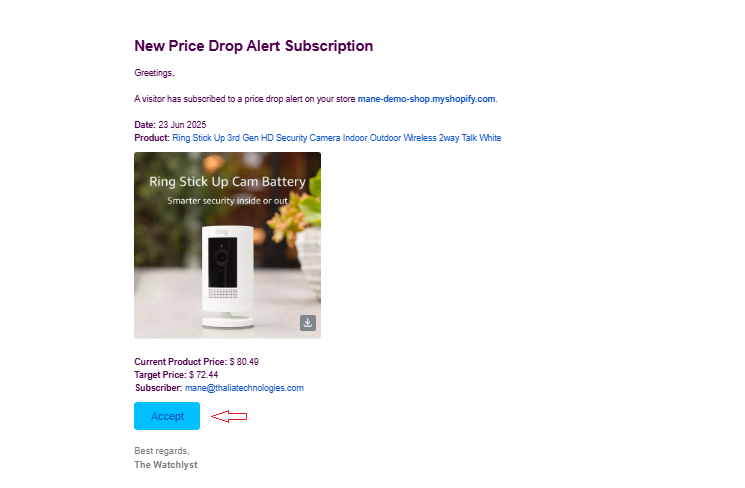
When a customer creates a price alert, the store owner receives an email notification.
The email includes an Accept button, allowing you to review and process the customer's request.
👀 Step 3: Review the Customer's Offer
Click the Accept button in the email.
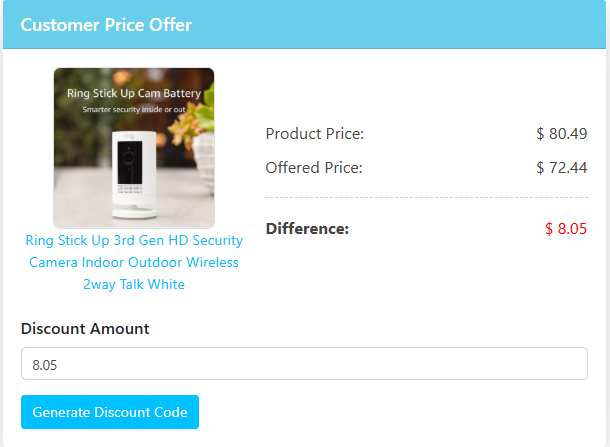
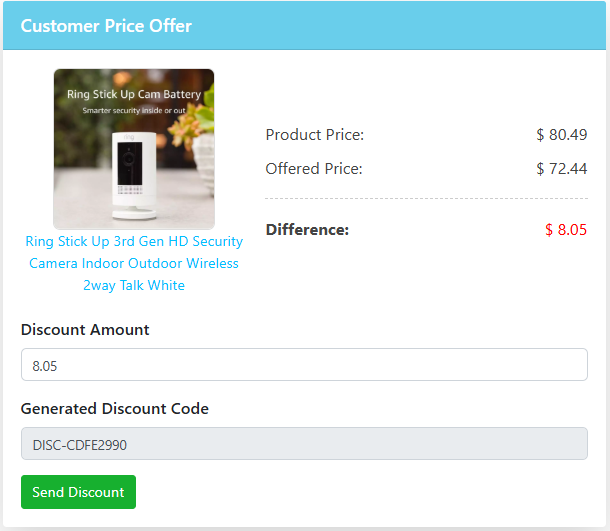
You'll be redirected to the Customer Offer Price page, where you can view:
- 🛍️ The selected product
- 💷 The current product price
- 🎯 The customer's requested target price
This helps you decide whether you'd like to offer a discount.
✏️ Step 4: Adjust the Discount Amount
Watchlyst automatically calculates the discount required to match the customer's requested price.
If needed, you can:
- ➕ Increase the discount
- ➖ Decrease the discount
This gives you complete control over the final offer before generating the discount code.
🎟️ Step 5: Generate the Discount Code
Once you're happy with the discount amount:
- Click Generate Discount Code.
The app will automatically create a Shopify discount code and display it on the page.
📧 Step 6: Send the Discount Code
Click Send Discount.
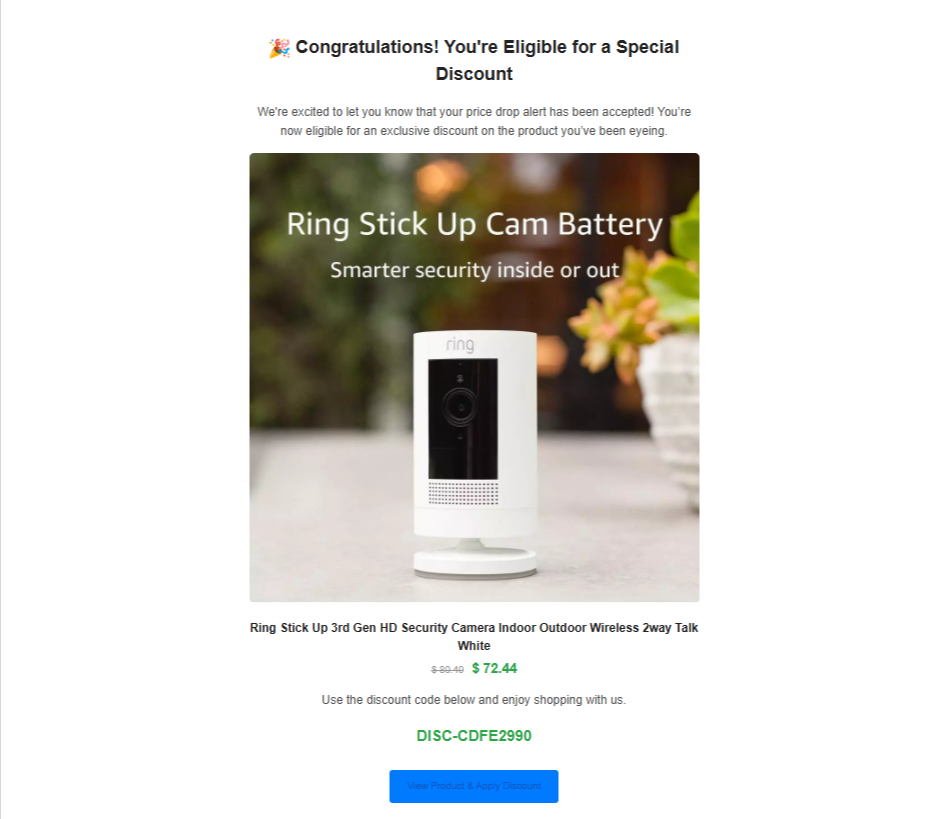
Watchlyst will automatically email the customer with:
- 🎟️ Their unique discount code
- 🛍️ A link to the product
- 💷 The personalised offer
The customer can then return to your Shopify store and complete their purchase using the discount code.