The Variant Button Block lets you add custom buttons for each product variant, making it easy to direct customers to relevant resources based on the option they've selected.
Whether it's a size guide, user manual, product video, or promotional page, each variant can have its own unique button and destination.
✨ Benefits
- 🔗 Add variant-specific external links
- 📖 Link to manuals, guides, videos, or promotional pages
- 🎯 Show the right resource for the selected variant
- 🎨 Customise button text, style, and placement to match your Shopify store
- 🤝 Enhance the shopping experience with quick access to helpful information
How does it works ?
Step 1: Setup the metafield
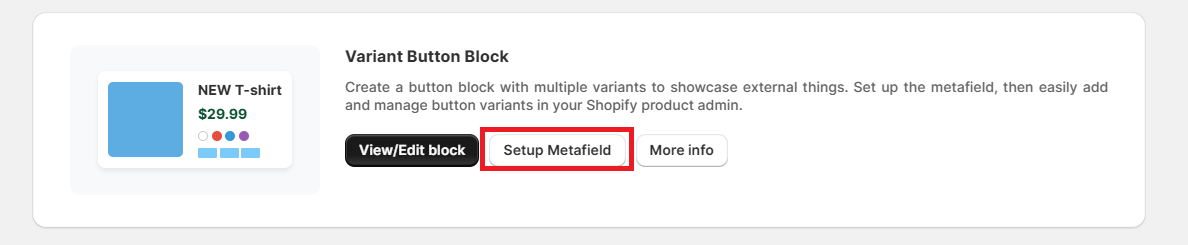
- On your app dashboard homepage, locate the "Variant Button" block.
- Click Setup Metafield to automatically create a variant-level metafield:
- Namespace & key > neo.variant_button
Step 2: Add entries for metaobjects
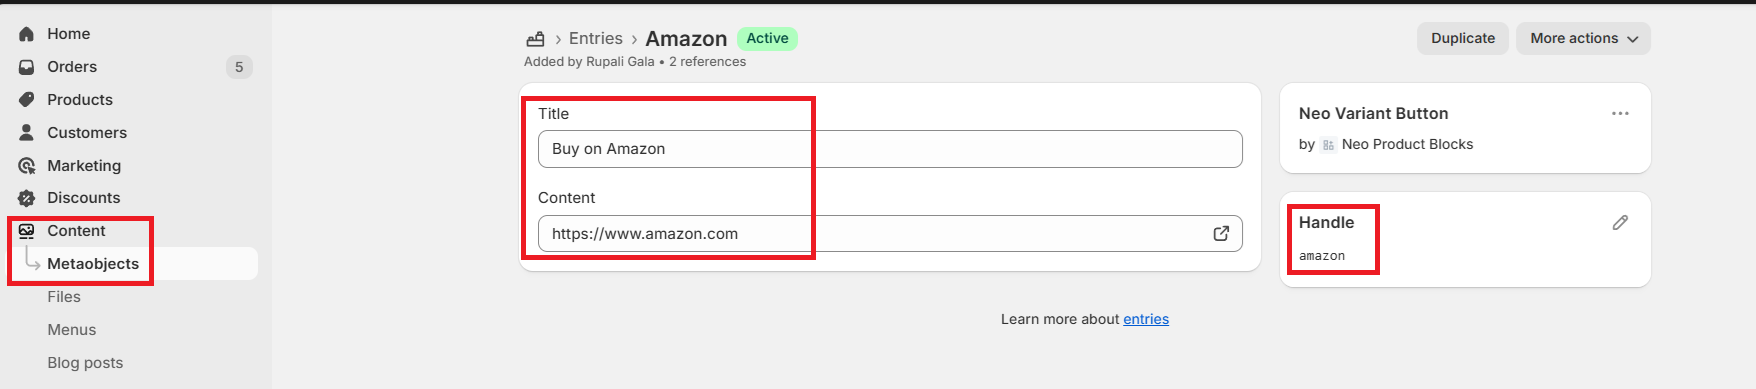
- In your Shopify admin, go to Content > Metaobjects.
- Locate the Neo Variant button Block.
- Add entries containing:
Title
URL
Pro Tip: Use unique handle names for each button entry. This makes it easier to identify and assign them to the right variants later.
Step 3 : Assign entries to variants
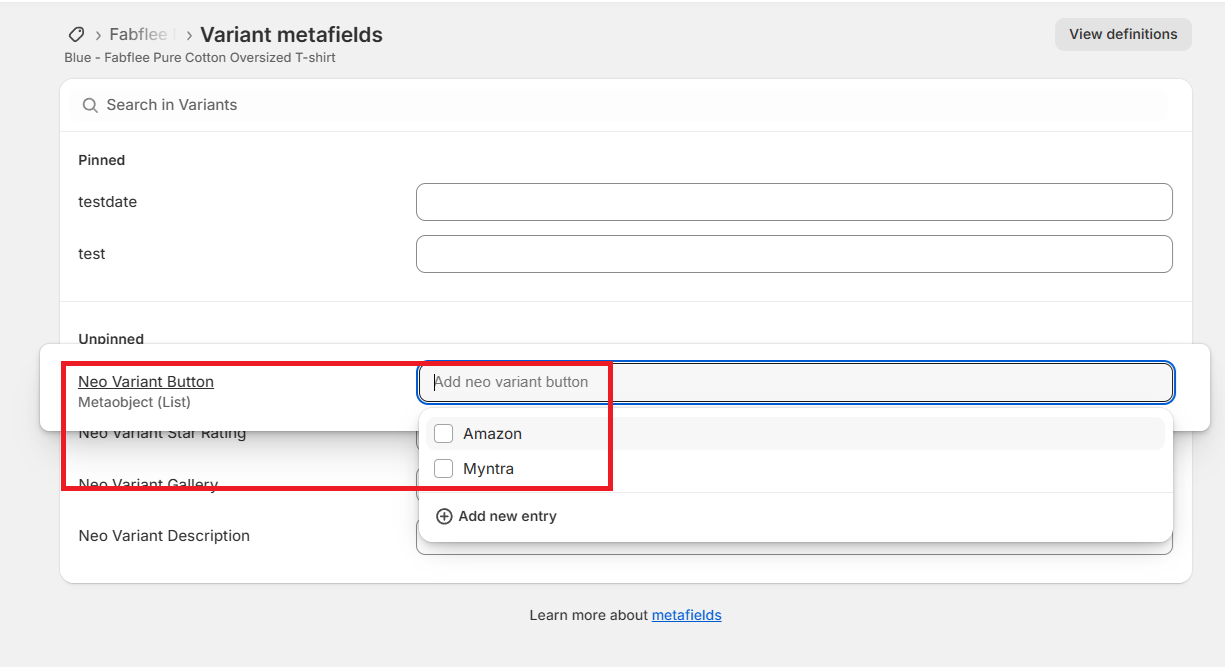
1. Go to your Shopify admin and navigate to the specific variant you wish to edit.
2. Scroll down to Metafields and look for "Neo Variant Button ".
3. Add the entry that you wish to show for variant.
Step 4: Add the block to your product template
- Go to Online Store > Customize theme settings.
- Open your Product Template.
- Add and position the Variant Button Block as required. We recommend placing it above/below the Add to Cart button.
Step 5: Style your block
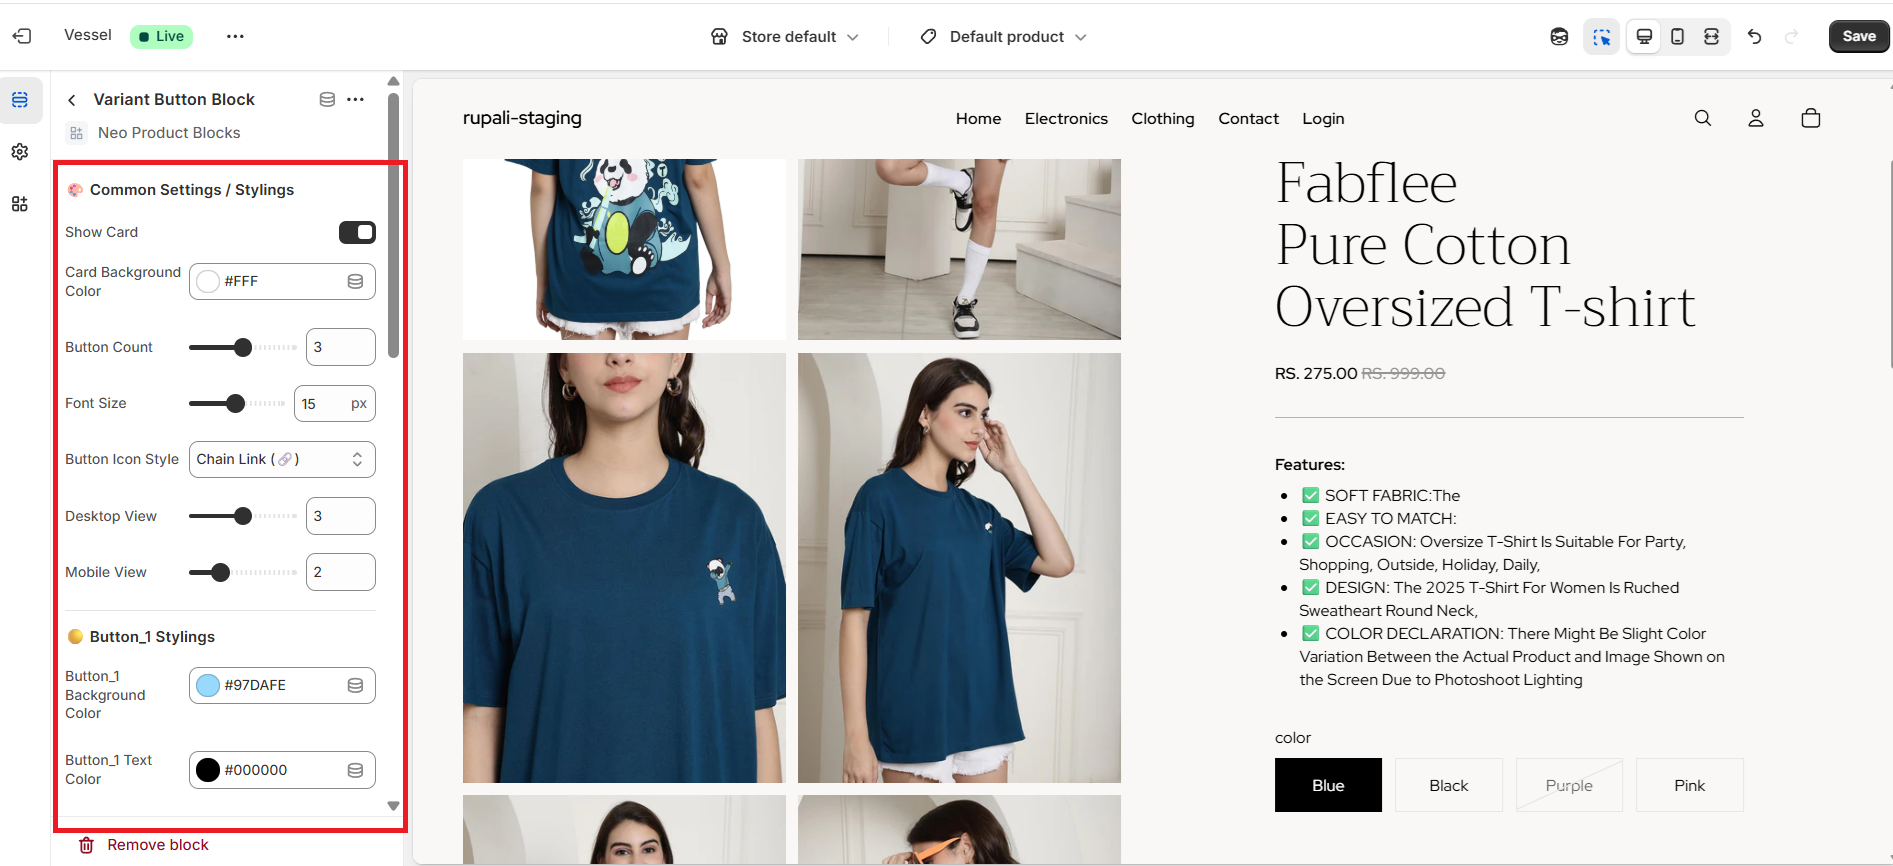
From the block settings, you can customize:
- Font size
- Text, border and background colors
Note:
- The Button_1 styling settings apply to the first button entry assigned to a variant, Button_2 to the second, and so on.
- You can display a maximum of 5 buttons per block.
Preview your changes to make sure they align with your store’s branding.
Step 6: Save & Publish
When everything looks good, click Save to publish your updated product pages.