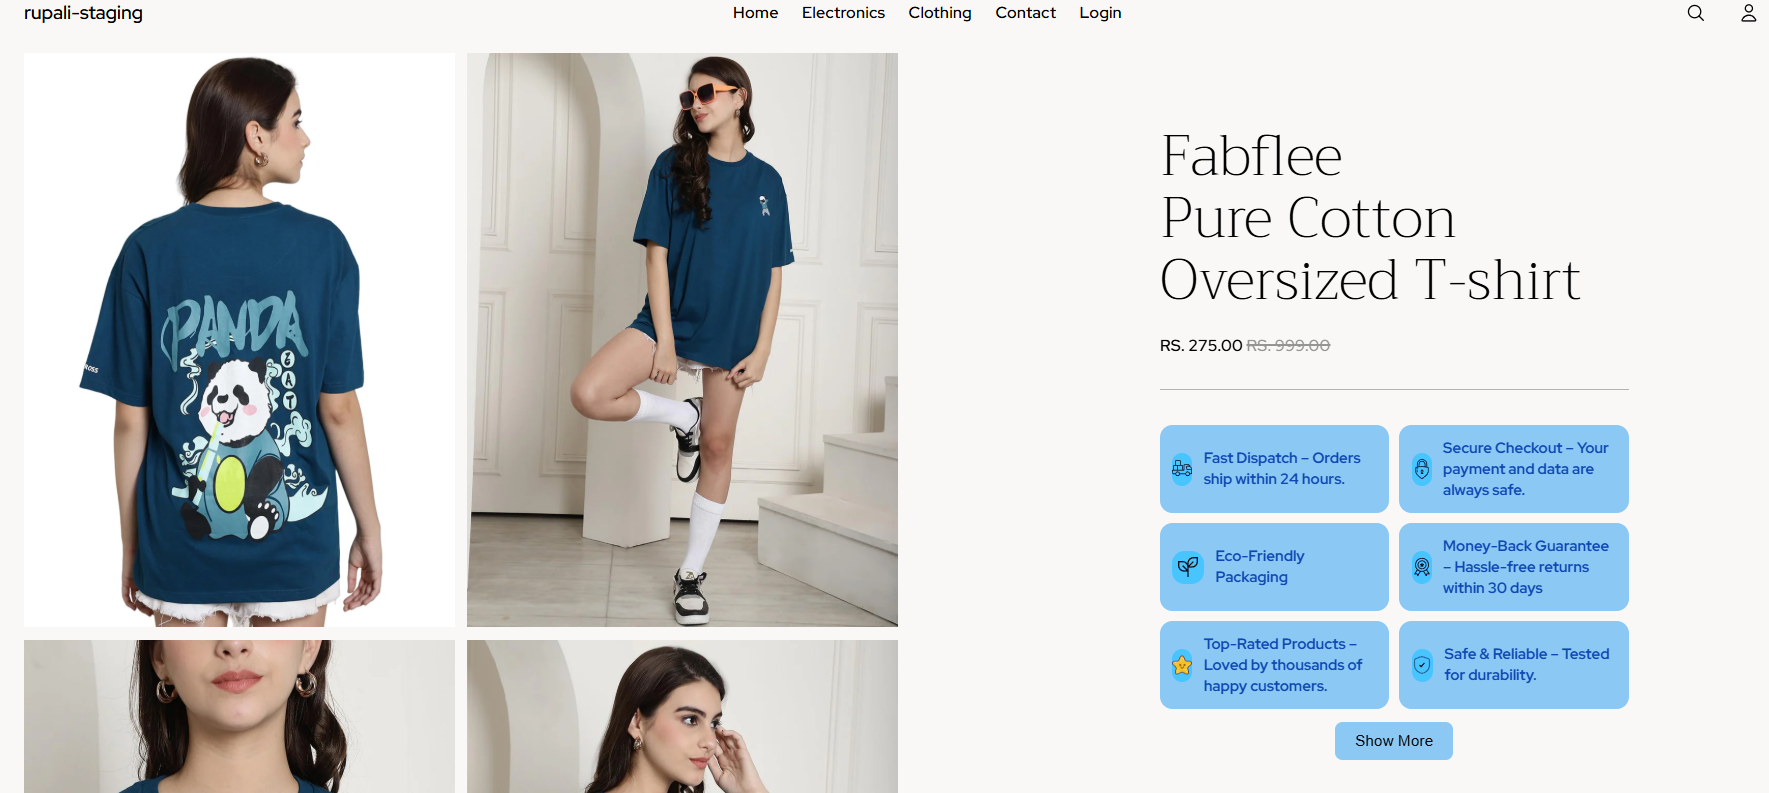
The Benefit Boxes Block lets you showcase your store's key selling points using eye-catching icons or images with supporting text.
Highlight benefits such as Free Shipping, Easy Returns, Secure Payments, Eco-Friendly Materials, or Warranty Protection to help customers understand why they should buy from your store.
✨ Benefits
- 🎯 Highlight your product and store's key advantages
- 🚚 Showcase benefits like Free Shipping, Easy Returns, or Warranty
- 🖼️ Display icons or images alongside descriptive text
- 🤝 Build customer trust and confidence
- 🎨 Customise colours, icons, and layouts to match your Shopify store
How It Works?
Step 1: Setup the Metaobject
- On your app dashboard homepage, locate the "Benefit Boxes" block.
- Click Setup Metafield to automatically create a product-level metafield: neo.benefit_box
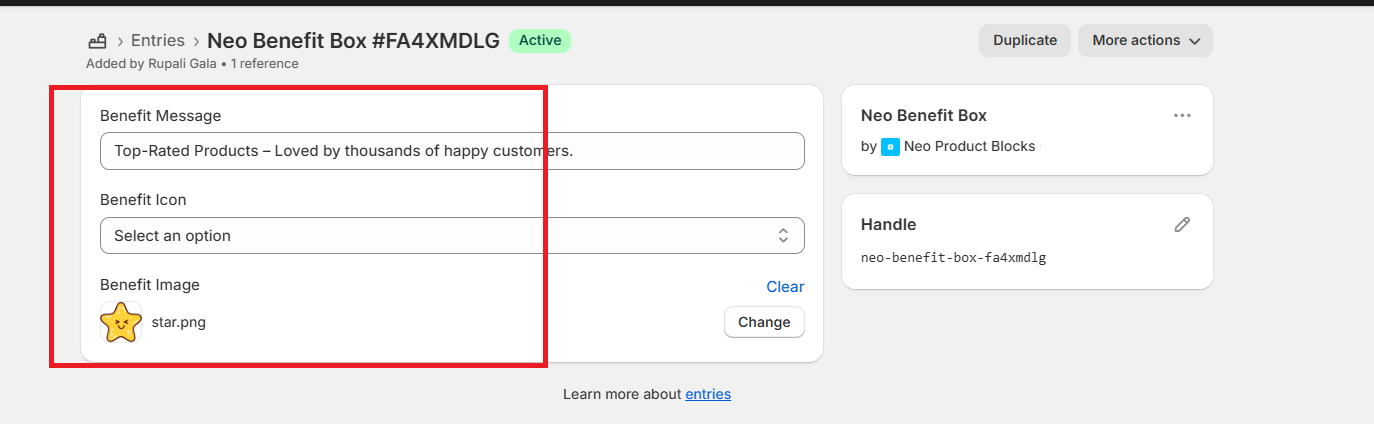
Step 2: Add Benefit Entries
- Go to Shopify Admin > Content > Metaobjects.
- Find and open Neo Benefit Boxes.
- Add new entries with:
- Benefit Message – e.g., “Free Shipping on Orders Above $50.”
- Benefit Icon/Image – upload or choose an icon to represent your message.
You can add as many benefit entries as you want.
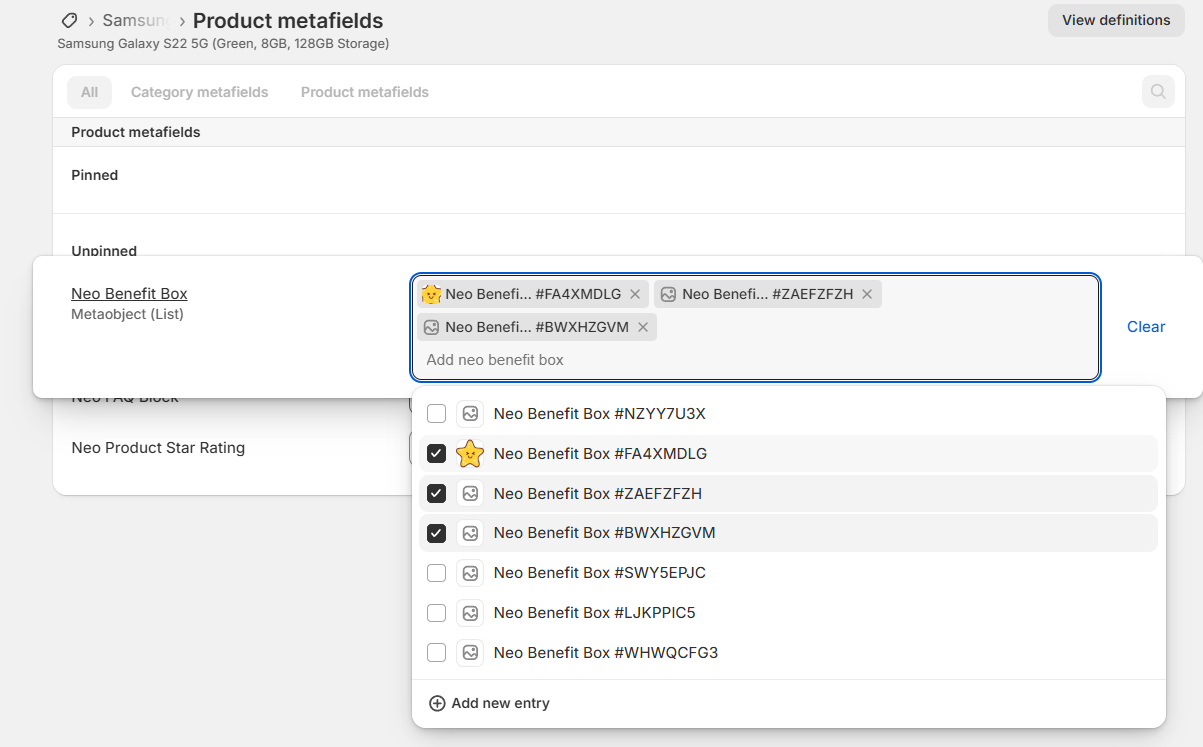
Step 3: Assign Benefits to Products
- In Shopify Admin, open the product you want to update.
- Scroll down to Metafields and look for Neo Benefit Boxes.
- Assign the benefit entries you’d like to display on that product.
- Save your changes.
Step 4: Add the Block in Theme Editor
- Go to Online Store > Customise.
- Select your Product template.
- Add and place the Benefit Boxes Block where you want it to appear (e.g., below description, above add-to-cart button).
4. Save your changes.
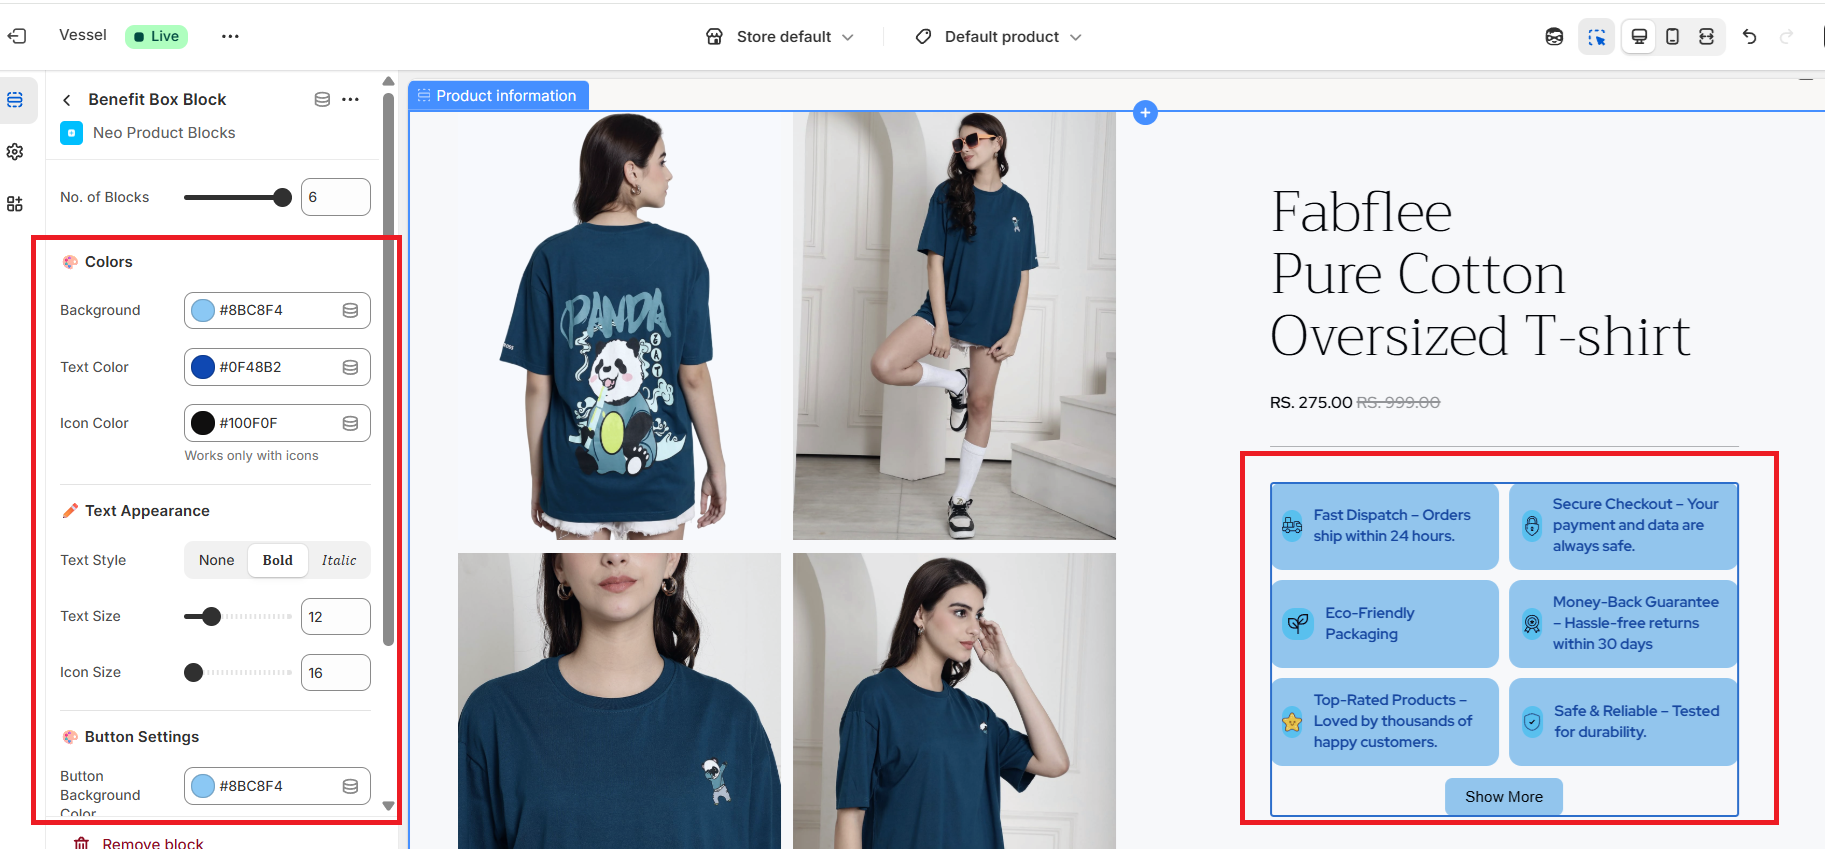
Step 5: Style your block
From the block settings, you can customise:
- Font/Icon size
- Text, icon and background colours
Preview your changes to make sure they align with your store’s branding.
Step 6: Save & Publish
When everything looks good, click Save to publish your updated product pages.
Sample Preview Block